*Pro Plans Only
You can use BuildKeeper to generate invoices for your jobs. BuildKeeper automatically includes the hours and expenses you've tracked to ensure all work gets billed and nothing gets missed.
To start, go to the Jobs tab and select View Invoices. Here you will find a list of invoices previously created. Invoices are categorized in three ways:
| PENDING | Invoice has been created but not sent |
| DUE | Invoice has been sent but payment is outstanding |
| PAID | Invoice has been sent and payment has been collected |
To create a new invoice
1. On the View Invoices page, click ![]() Create New Invoice.
Create New Invoice.
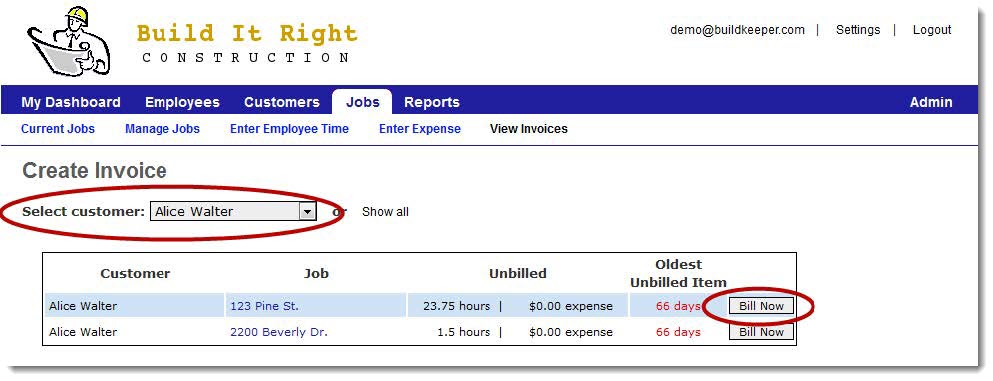
2. From the drop-down menu, select the customer you would like to bill. A list of jobs with outstanding time and/or expenses will appear.
3. Click Bill Now for the desired job.
 4. From the drop-down menu, select the type of invoice you'd like to generate:
- Blank Invoice – Create an invoice with blank fields where you can enter custom items, descriptions and amounts.
- Progress Invoice – Bill for a partial amount of the total estimate. You can filter by date range and select phases to invoice.
- Final Invoice – Bill for a completed job. The remaining amount will be automatically calculated.
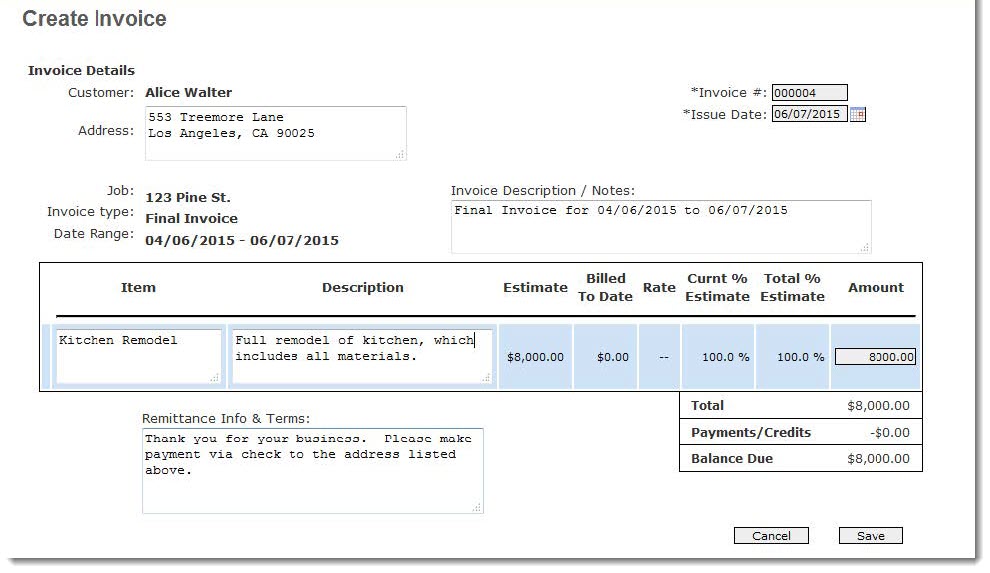
5. Click Next. The invoice template will appear.
6. If you selected a Progress or Final Invoice, most of the fields will be pre-filled with customer and job information. Make changes as necessary and select Save.
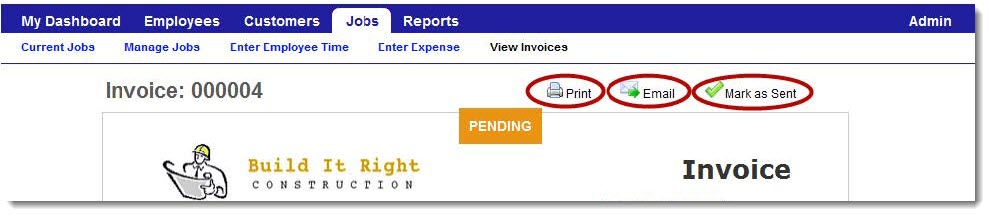
After the invoice is created, you can email it directly from BuildKeeper to your customer. While viewing the invoice, select Email. You will be taken to the Email Invoice page, where you can write your message. If you choose to print and mail or hand the invoice directly to your customer, select Print and then Mark as Sent to record when the invoice was provided.